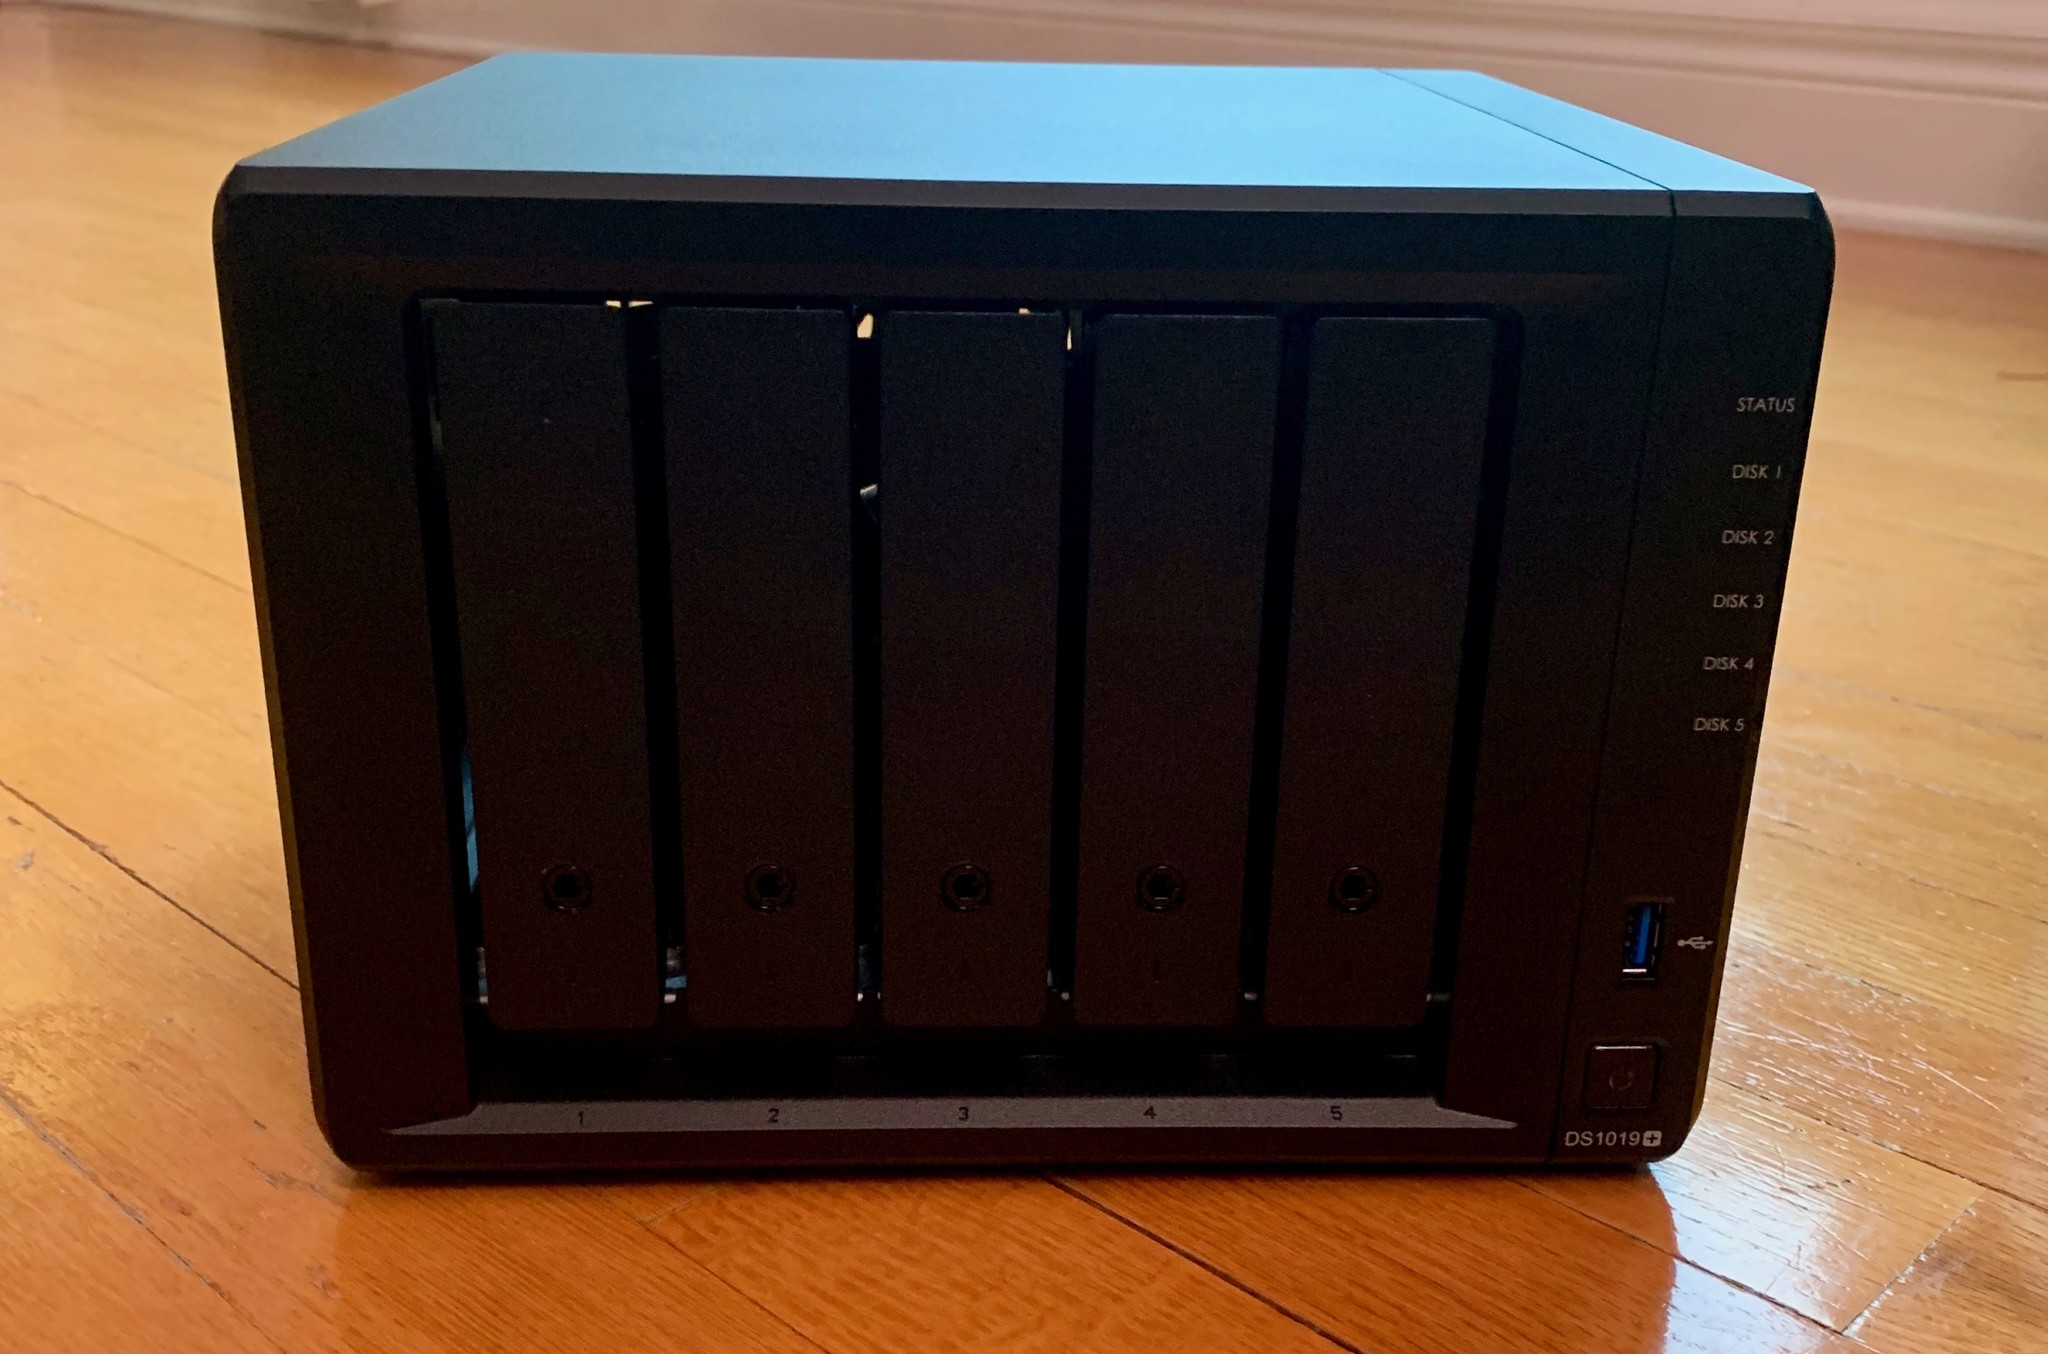
Synology, makers of the Diskstation networked attached storage (NAS) appliances, reached out to me to see if I’d like to take a look at its DS1019+ ($650 on Amazon) for use in your home or small office, or as a home backup solution. We at iMore have already given it a rave review and I have been a user of the DS1513+ since 2014 and since I just love that machine so much I jumped at the offer. I’ve already detailed how to go about setting up the hardware on the DS1019+. Here we’ll get into the initial installation of the software environment so that you can get right into using the storage capabilities of the network attached storage (NAS).
- More than just a NAS
- DS1019+ specifications
- Software setup
- Final comments
More than just a NAS
I’m not keen on limiting my description of the Diskstation to nearly a backup repository. I also use it for my VPN (in and out of my network), my mail server, dynamic IP resolution, SSH server, DHCP server, router, Plex server, and torrent client. And since it runs a custom GNU/Linux as the OS, I can get in a do other more tacky Linux things straight on the device via an SSH shell. So if you add a Synology Diskstation to your network, you’re potentially also adding a bunch of extra capabilities that can scale with your needs. Pretty good deal.
With all that said, let’s see how to go about the initial software setup!
DS1019+ specifications
The DS1019+ comes with a 64bit Intel Celeron Quad core that boosts up to 2.3 GHz and 8GB of DDR3L of RAM. Without an optional expansion unit, the DS1019+ can house 5x 14TB HDDs for up to 70TB or storage. It also comes with two Gigabit LAN ports, two USB 3.0 ports, and an eSata port for your externally connected devices.
My venerable and reliable DS1513+ came with a two-core four-thread Intel Atom processor. That CPU served my purposes for all of the tasks I threw at it, save one. Where it could not serve me well was in 4K video transcoding. Luckily, the DS1019+ has updated specs that include transcoding specific technologies such as H.264 (AVC), H.265 (HEVC), MPEG-2 and VC-1 for 4K video. It’s this aspect that I’m most excited about the much more powerful Celerons in this version.
Initial software setup
If you haven’t already done so, you can look at our article detailing how to do set up the hardware first. Once powered on, you can start the software setup process. There are two ways you can run the setup wizard. One is with Synology’s own desktop Assistant. The other is via a web browser connection. Both are equally simple but we detail the browser method since that is immediately available to users. If you run into any issues, you can download the Synology Assistant and follow similar steps as detailed below.
Getting the OS up and running
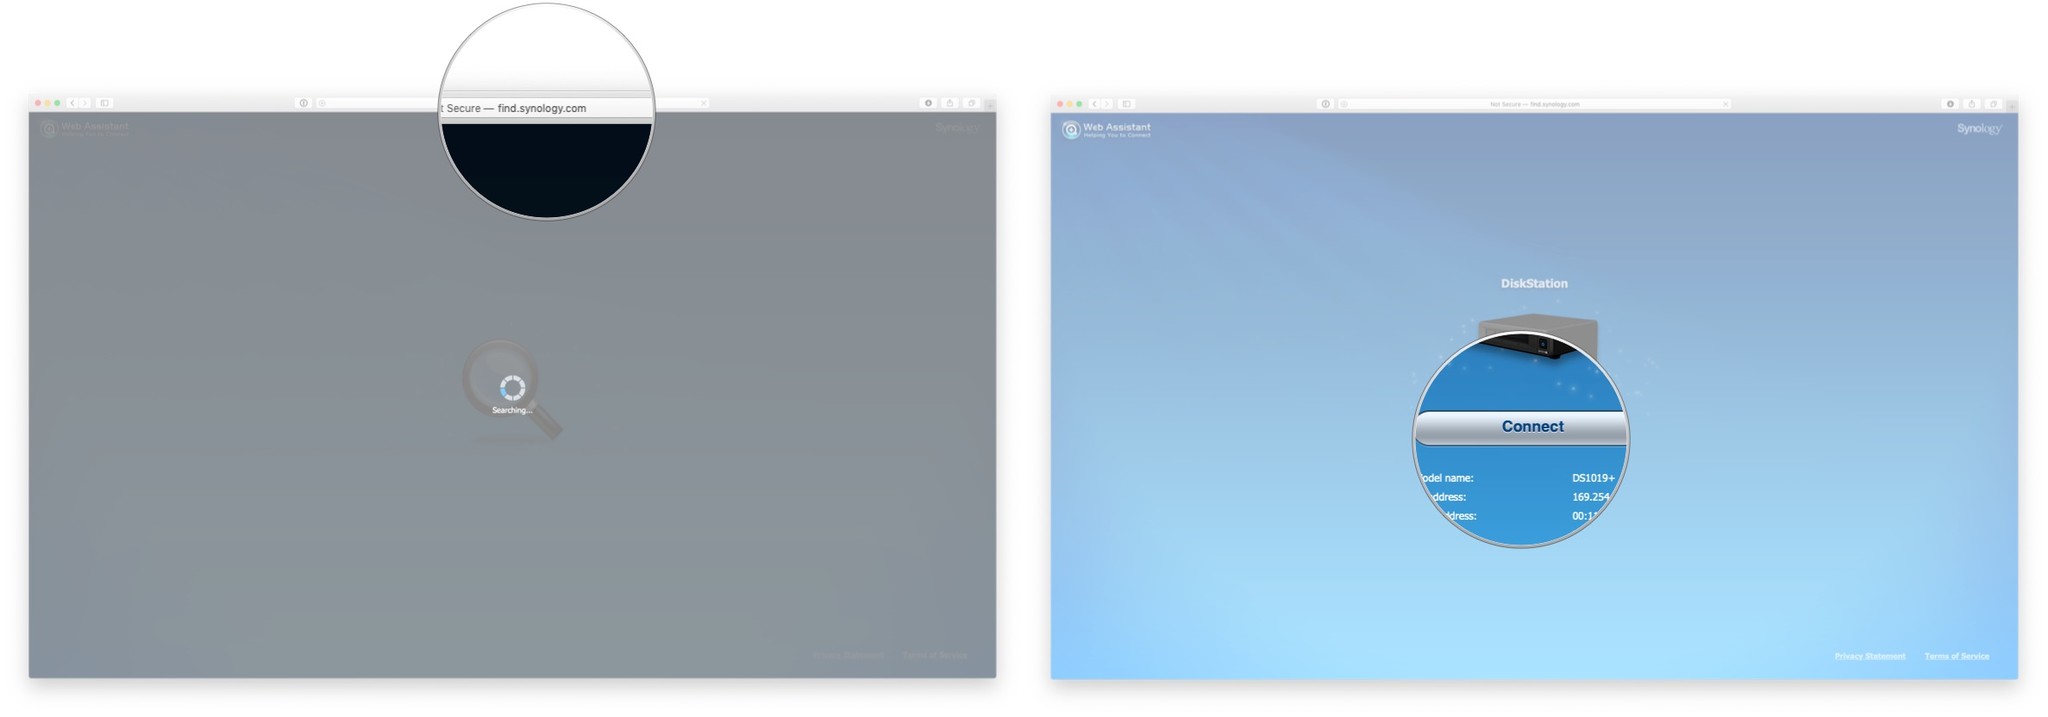
- Start Safari.
- Navigate to http://find.synology.com.
- The web applet that runs will now scan your network for any powered-on Diskstation attached to your network. This will also be able to find devices that do not have a properly configured network IP.
- Once it detects your Diskstation, click Connect.

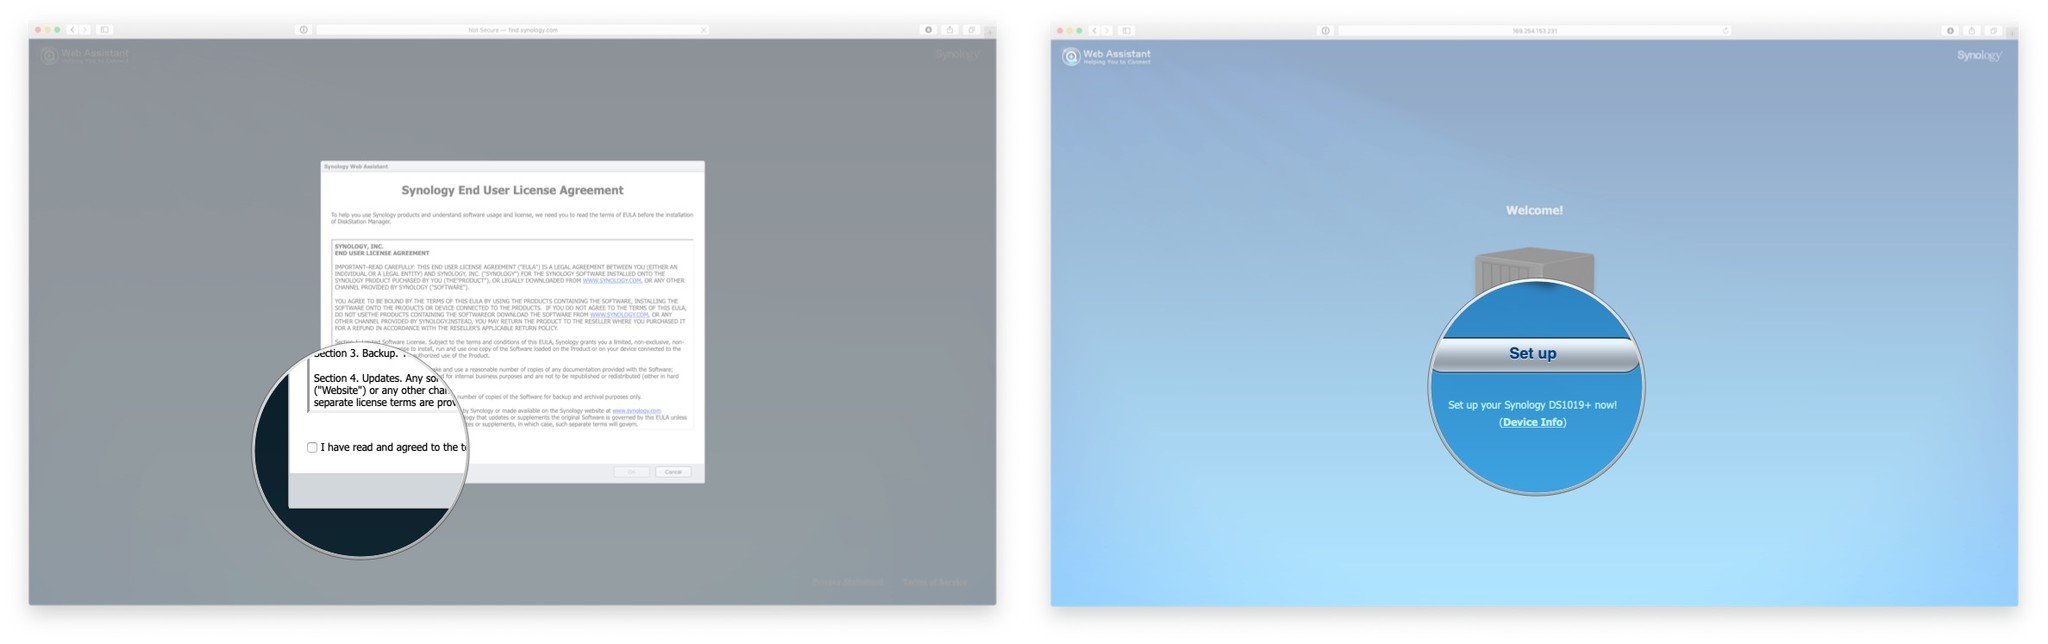
- Accept the end user agreement.
- Click Setup.

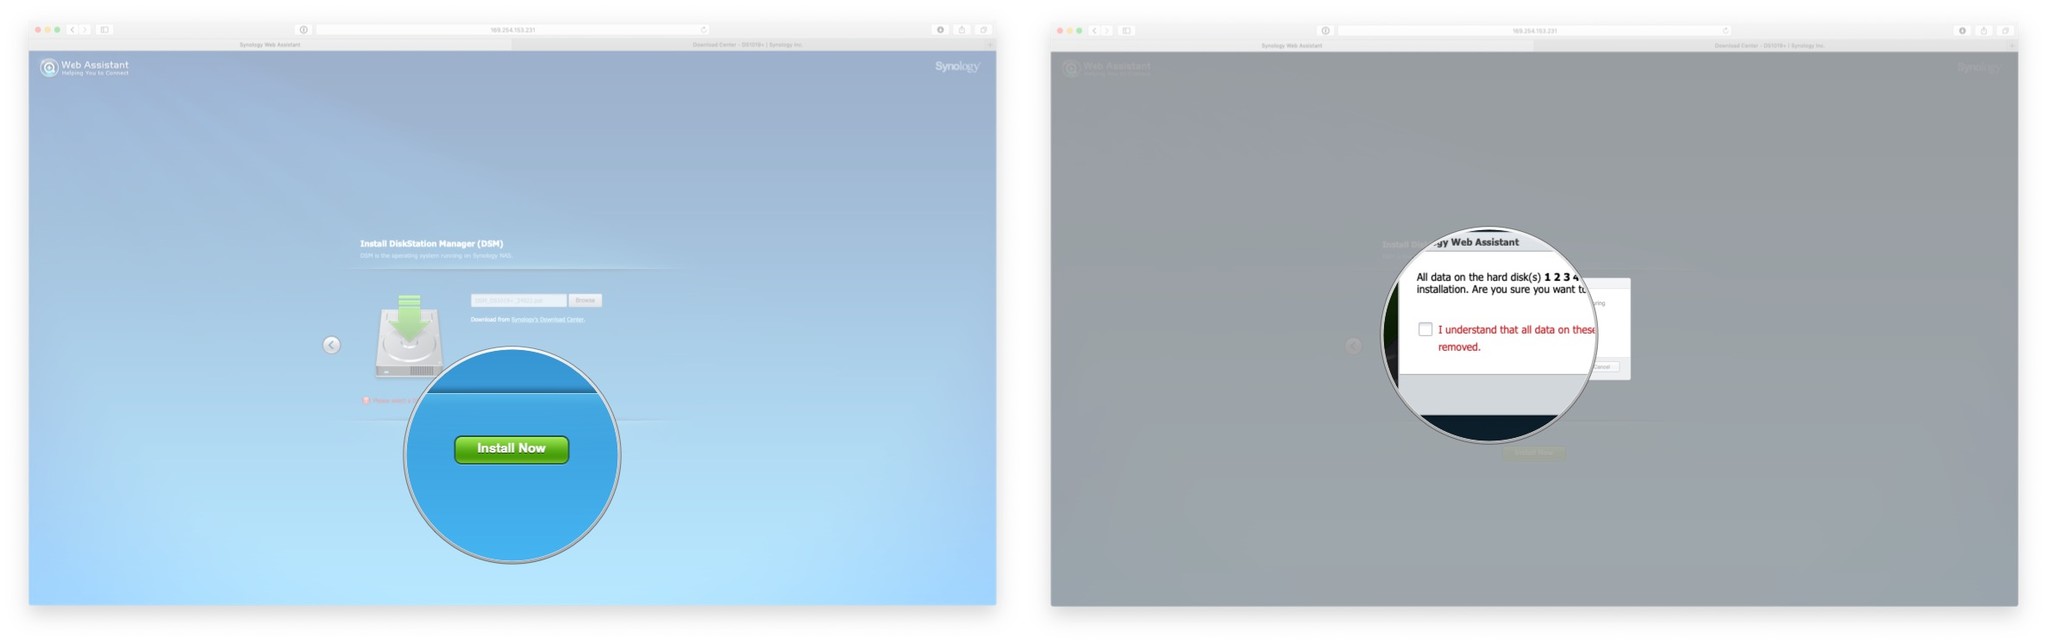
- Next, we’ll need to download the basic operating system called the DiskStation Manager (DSM). Click Download from Synology’s Download Center. This will open up a new browser tab.
- Your NAS should be automatically detected, if not enter the device details as requested.
- Underneath the Item column, you should see the latest version of DSM. Click Download (pat) to get the latest version.
- Go back to your Diskstation installation browser tab.
- Click Browse to find your download DSM file.
- Click Select once you’ve found it.
- Click Install Now.
- Check that you understand that all data will be removed.
- Click OK.

The installation will now take about ten minutes to complete. Once done, the initial setup will continue.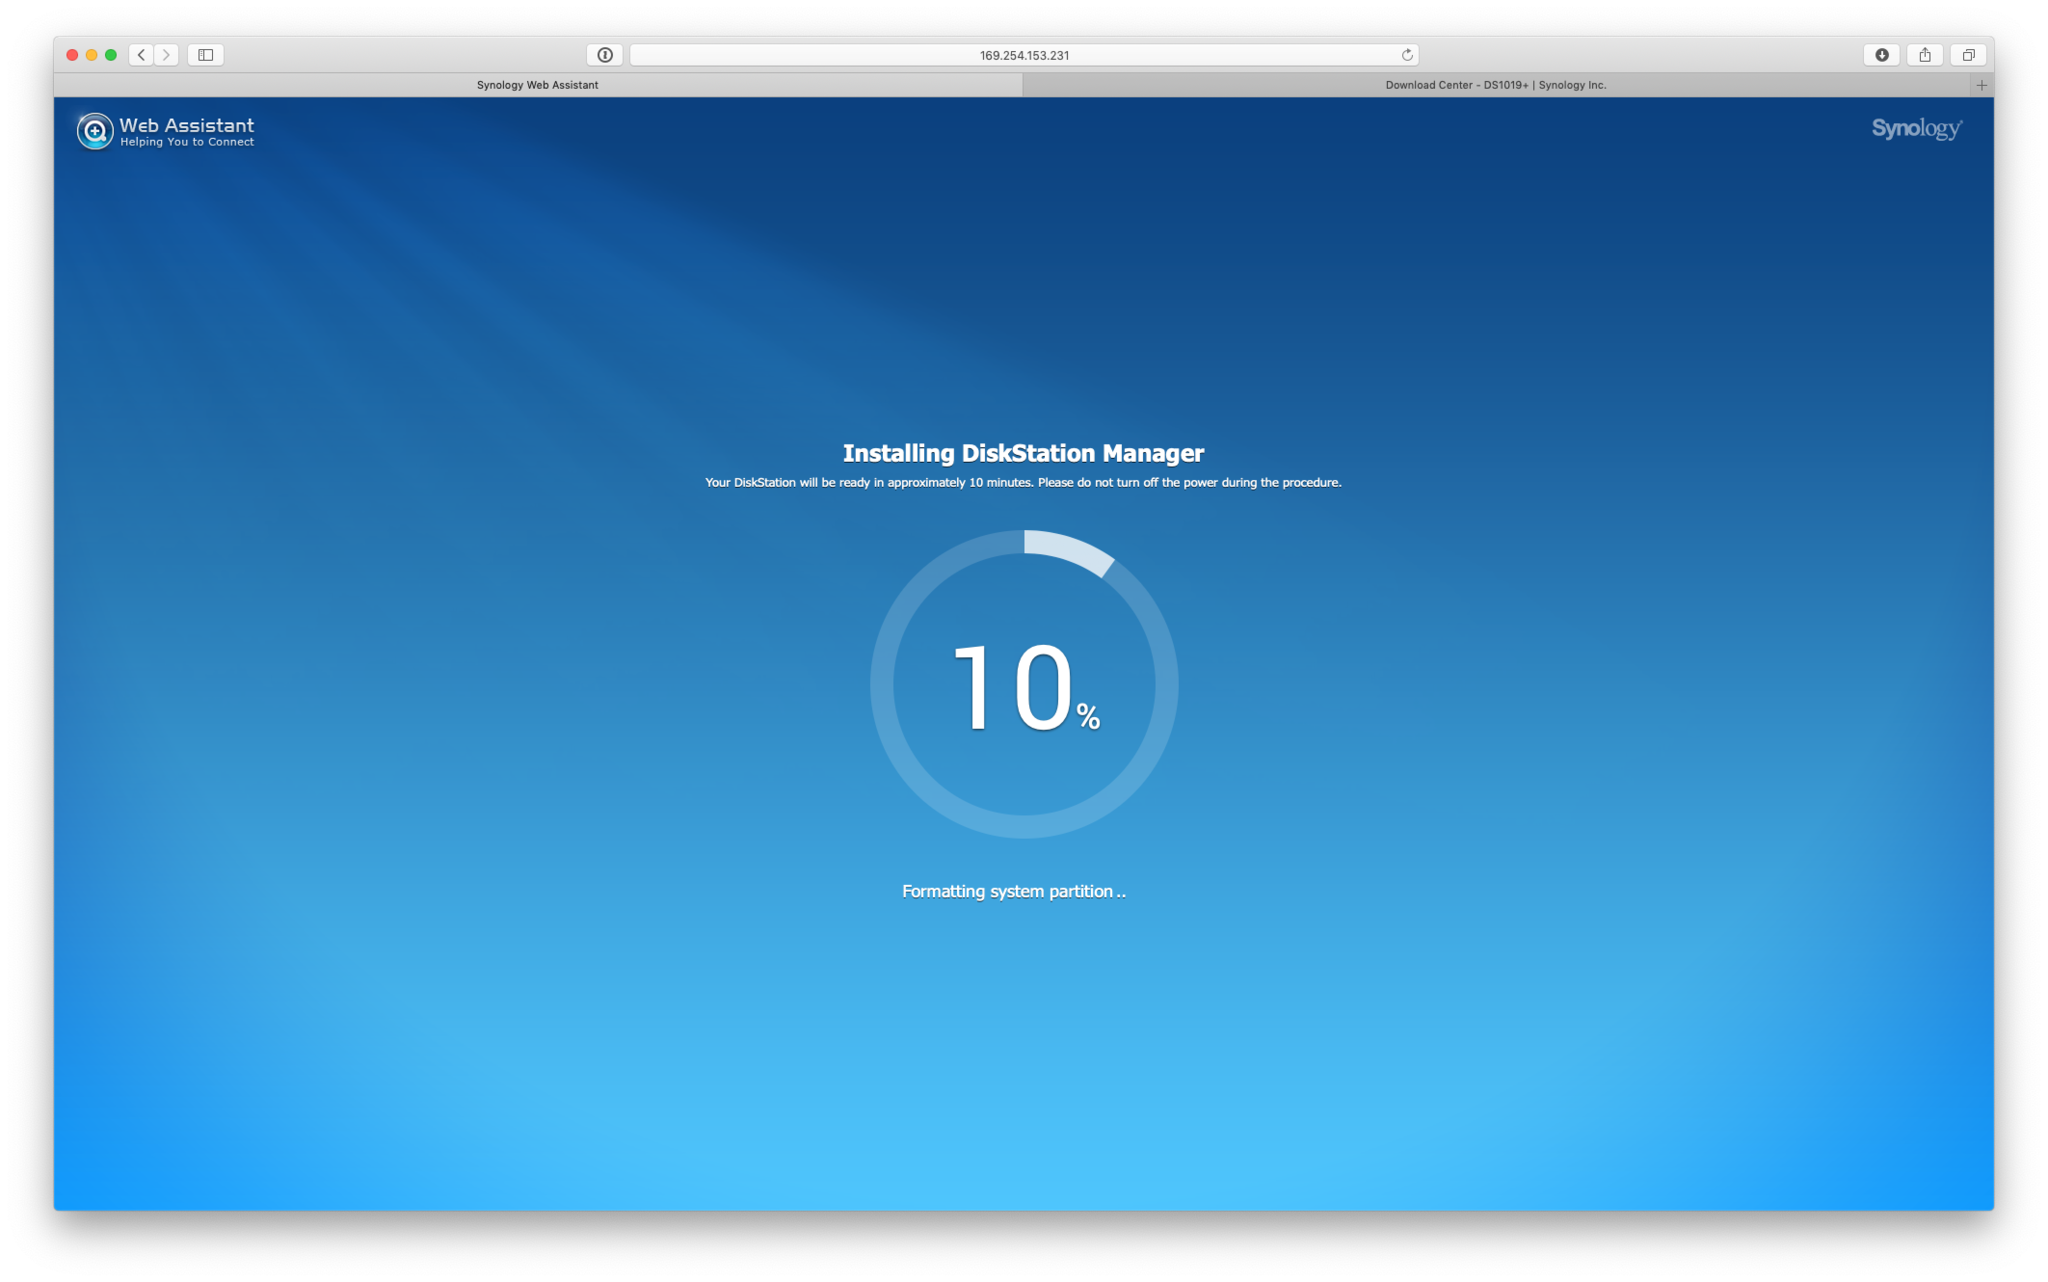
Adding a user account. Type in a Server Name.
- Enter a Username that will have administrative capabilities.
- Enter and confirm a Password for that administrative user.
- Click Next.
- Optionally, create or log in to a QuickConnect Synology account. This allows you to have remote access to the units as well as the services available securely using Synology’s dynamic naming servers.
- Click Next.
- Click Go.

Enabling disks and sharing
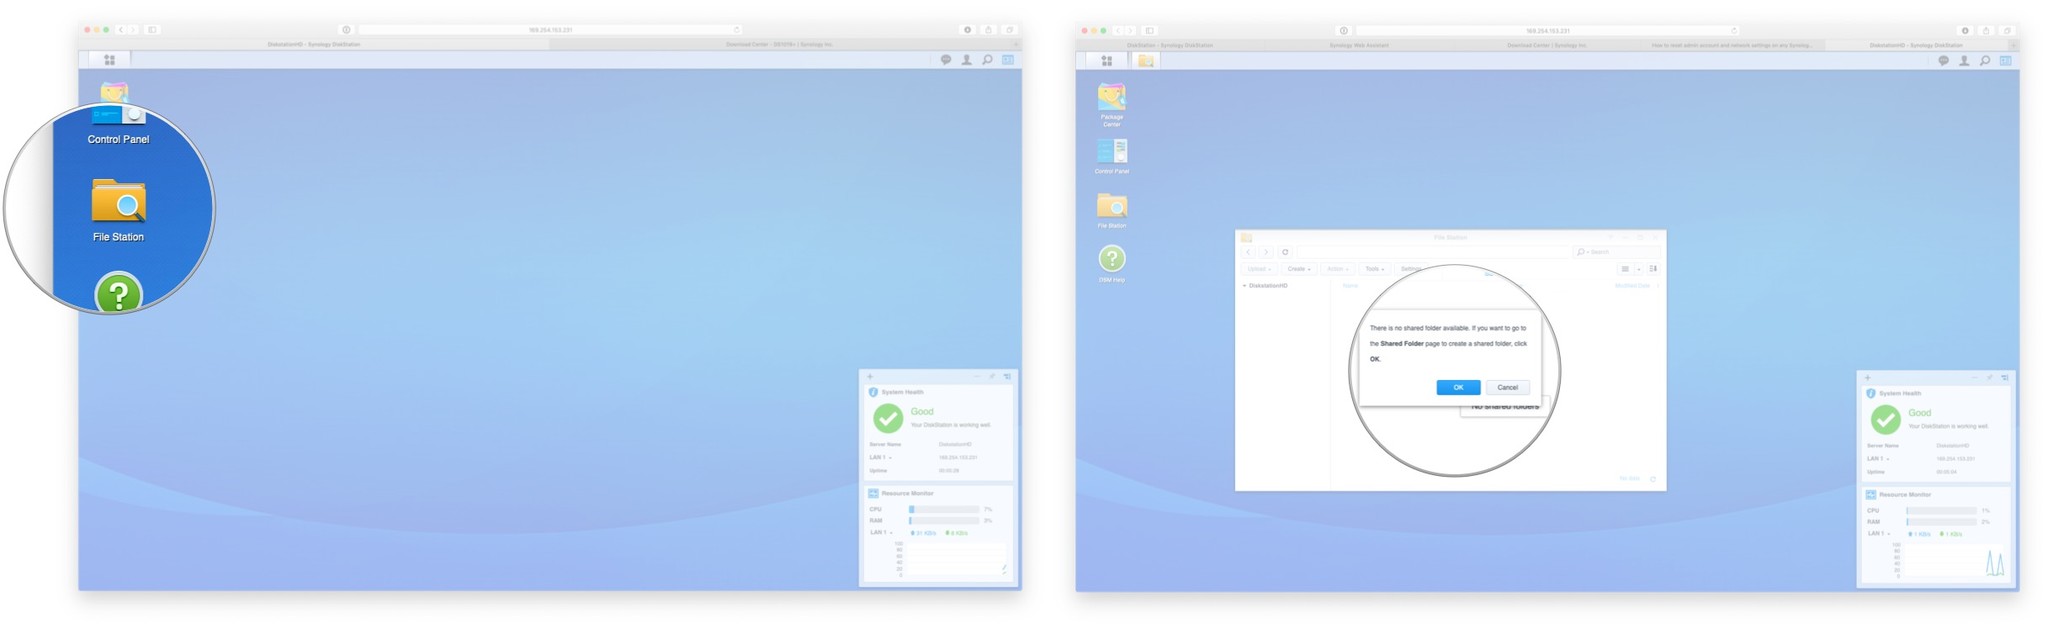
You’ll now be presented with the DSM desktop. We now need to do the initial setup for enabling the hard drive space and sharing it to the network.
- Double click on File Station.
- You’ll be prompted with an opportunity to create shared folders, click OK.

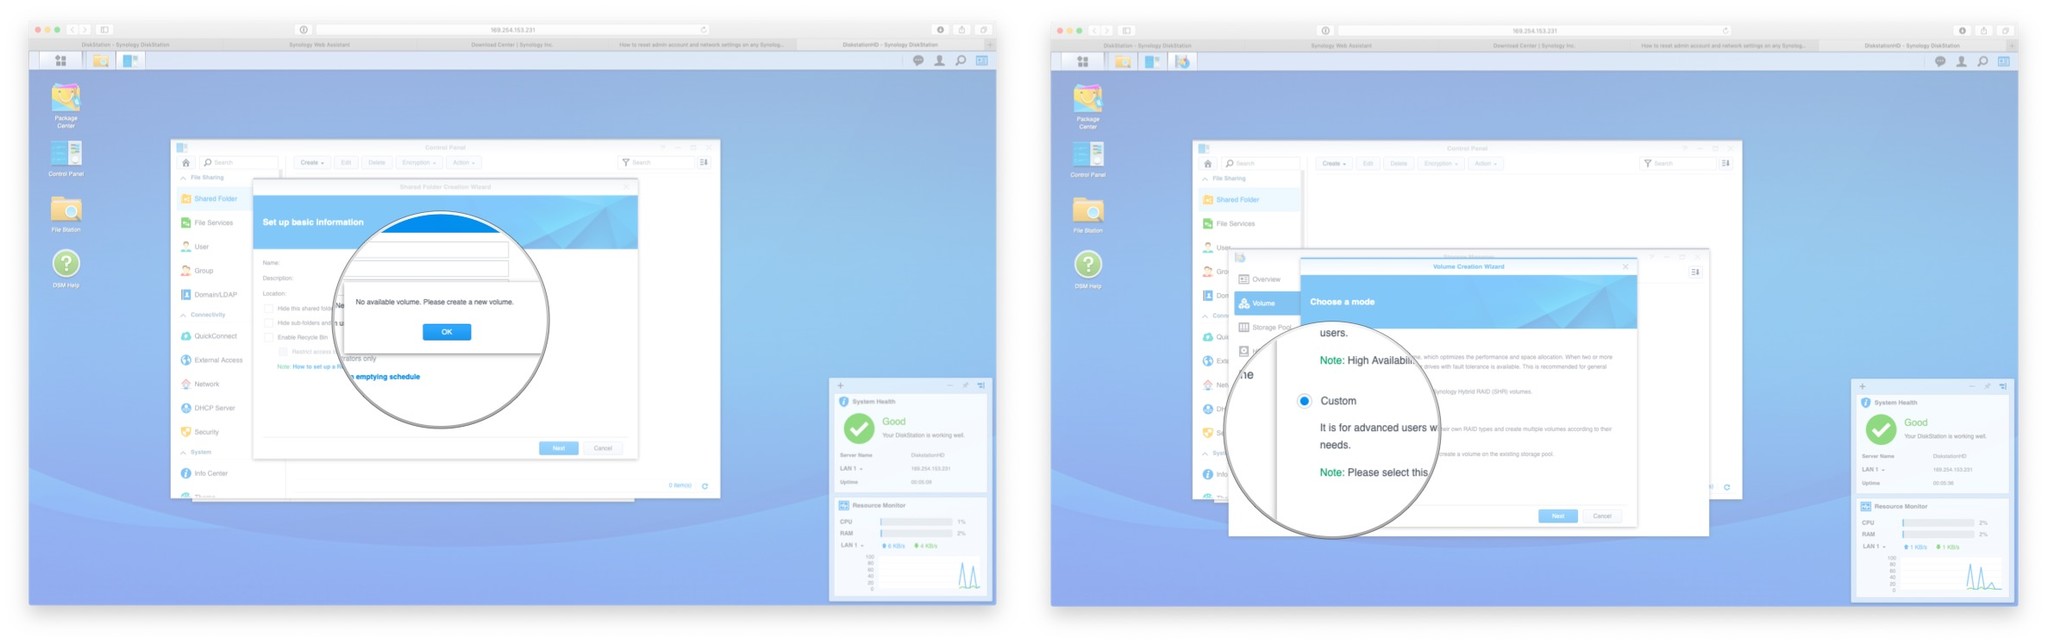
- You’ll be the prompted to create a new volume, click OK.
- Choose a Quick or Custom mode to create a volume. I chose Custom.
- Click Next.
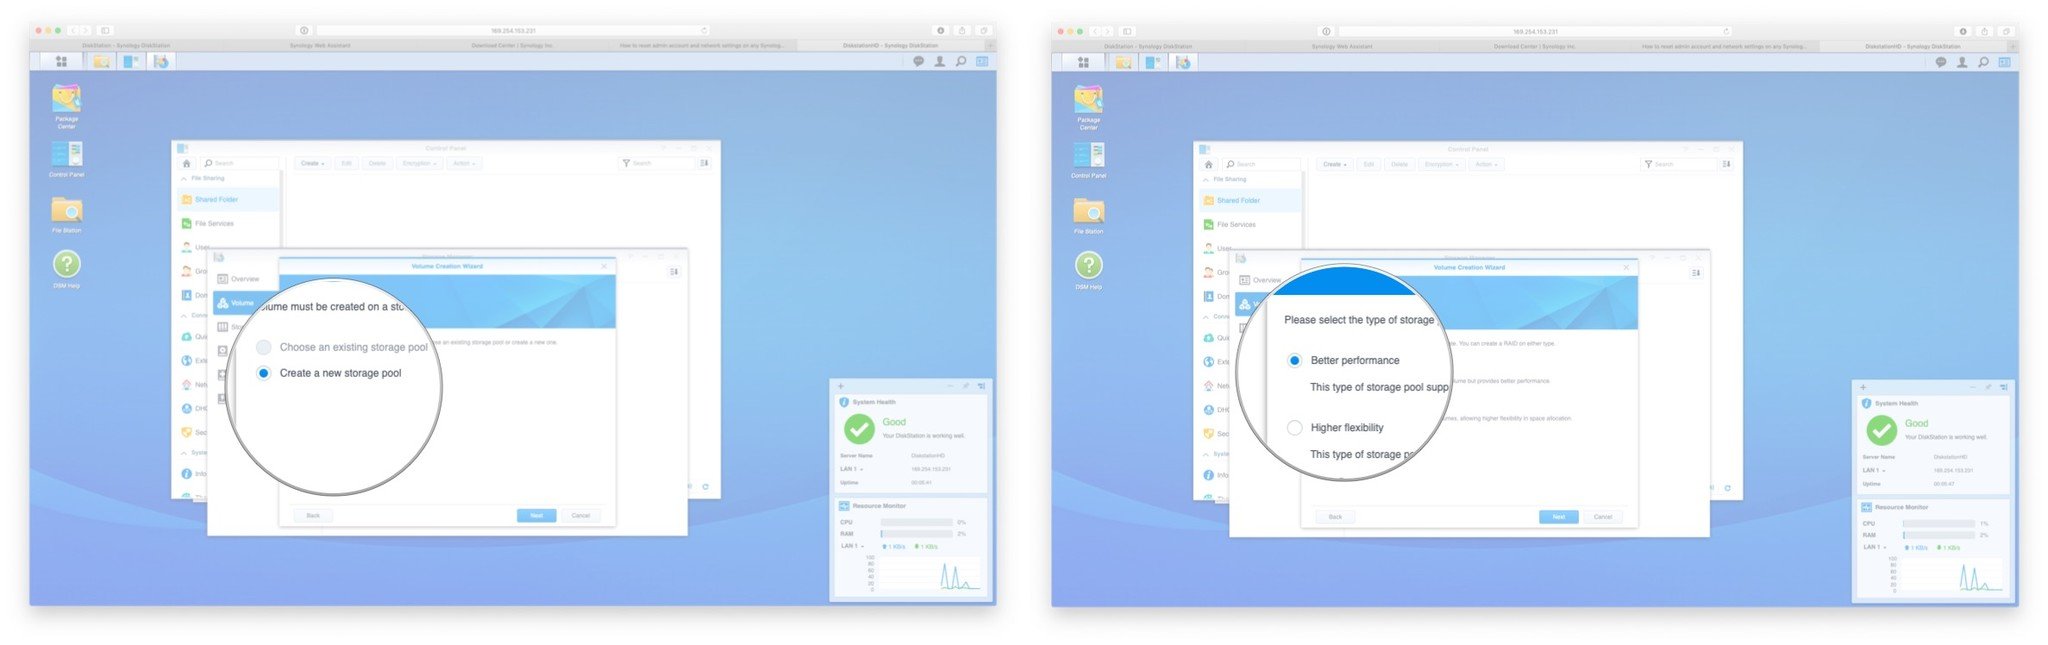
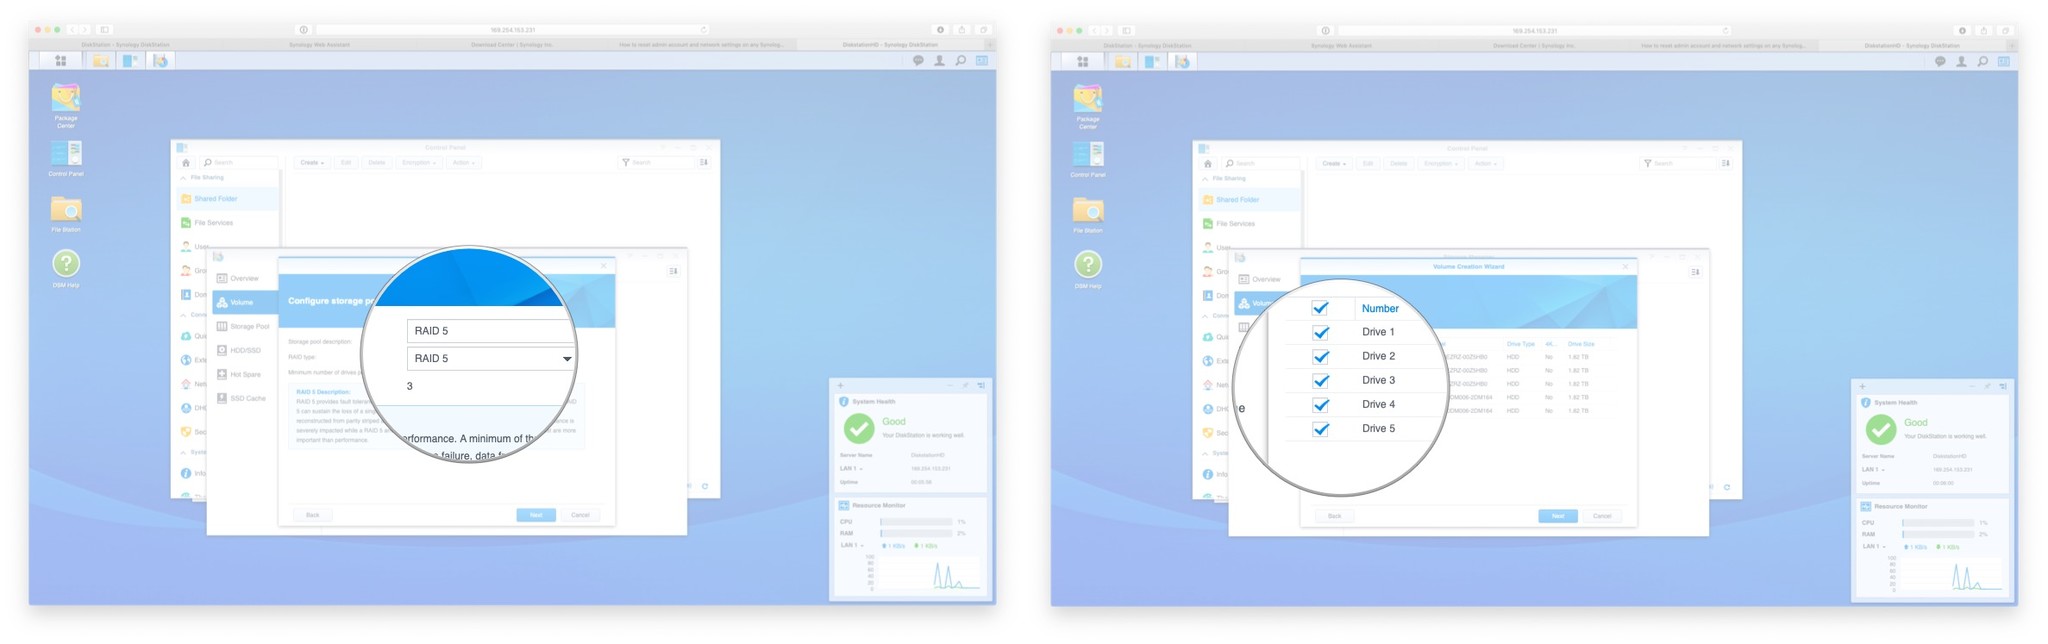
- Create a New Storage Pool.
- Click Next.
- Select Better performance or Higher flexibility for pool type.
- Click Next.
- Choose the type of disk redundancy. If in doubt choose RAID 5. You can also get more information about RAID types to make a better choice.
- Click Next.
- Select the disks you want to be part of the volume. I used all of my disks for the largest capacity.
- Click Next.
- Confirm you want to continue by clicking OK.
- Enter a description for the volume.
- Click Next.
- Select a Filesystem. I chose the native Btrfs.
- Click Next.
- Click Apply.


We can now finally create a network share.
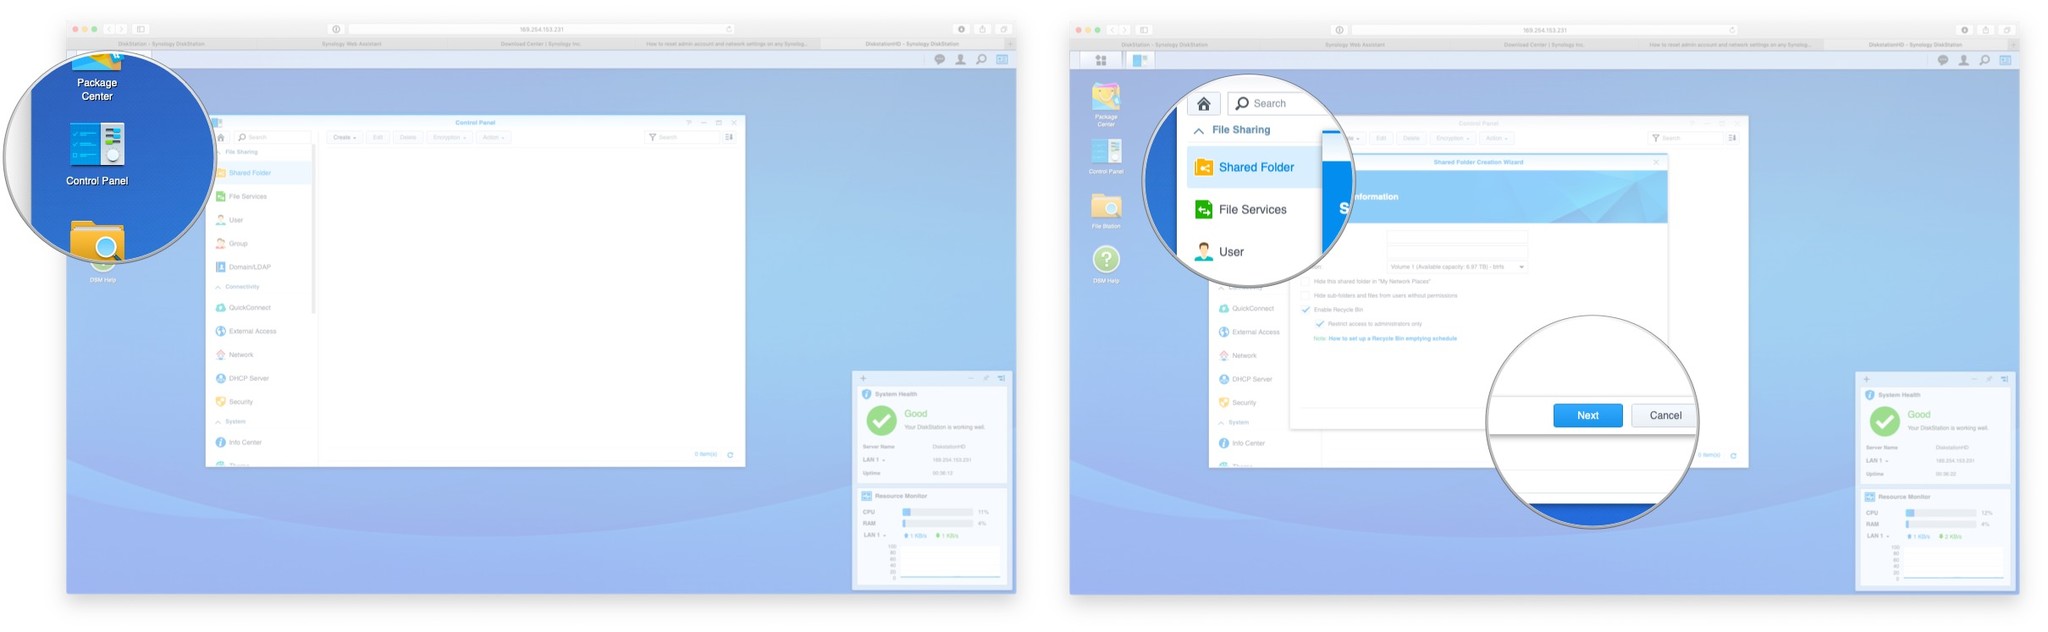
- Double click on the DSM Control Panel.
- Click Create.
- Enter a shared folder name.
- Give it a description.
- Click Next.

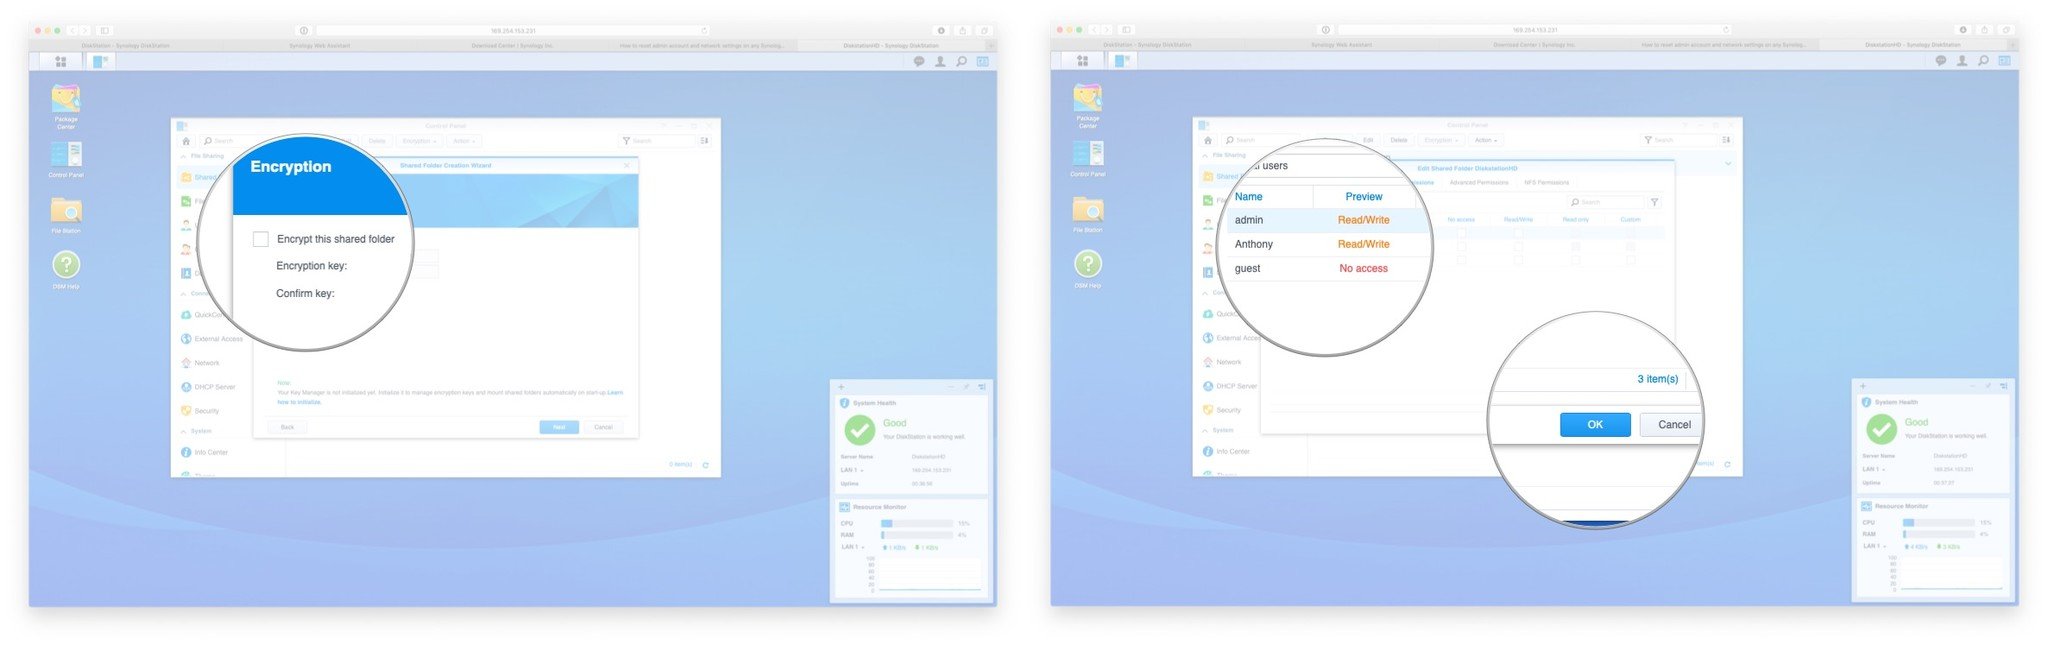
- Optionally encrypt the share.
- Click Next.
- Click Apply.
- Assign permissions as to what level of access a user can have to the share.
- Click OK.
Done!
[“source=imore”]
